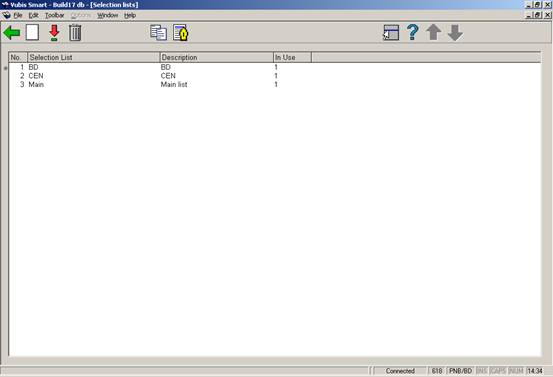
The aim of the reservation messaging is to get a copy of the title to its pickup point as efficiently as possible. For each pickup location, you should define a list of locations (i.e. service points) which are to be consulted preferentially for available copies; typically this would represent locations which are geographically close or which are perhaps served by the same van delivery schedule. After choosing this option an overview screen will be displayed:
: use this option to add a new selection list. See section 618.3.2.1 for details.
: select a line and then this option to view or modify the information. See section 618.3.2.1 for details.
: select a line and then this option to delete the selection list. The system will prompt for confirmation.
: select a line and then this option to create a new selection list based on information in the selected record.
: select a line and then this option to view or modify the details of the selected service point list. See section 618.3.2.2 for details.
After choosing the or option you will be presented with an input form:
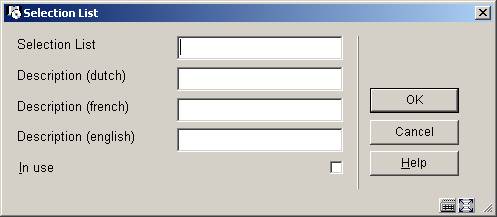
Selection list: enter a unique code for the selection list. For an existing code this field is protected and cannot be modified.
Description (language): enter a brief description in each language.
In use: check this box to denote the selection list is in use. Selection lists can be set to inactive rather than completely delete them, if desired.
: select a line and then this option to view or modify the details of the selected service point list. After choosing this option an overview screen will be presented:
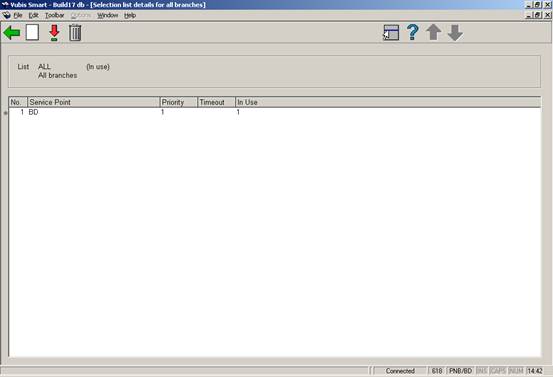
: use this option to link a new service point. An input form will be displayed:

For each service point on the list, you can define a priority –a lower number means a higher priority. Thus for example one might choose to prioritise the main library over a small branch library when trying to find an available copy of a title; or prioritise a closer branch over a more remote one.
A timeout period may also be defined which would be used in preference to the timeout allocated to the service point.
: select a line and then this option to view or modify the information. See the information under for details of the input form.
: select a line and then this option to delete the service point. The system will prompt for confirmation.
Use this menu option to relate the Pickup locations to the service point lists. After choosing this option an overview screen will be displayed:
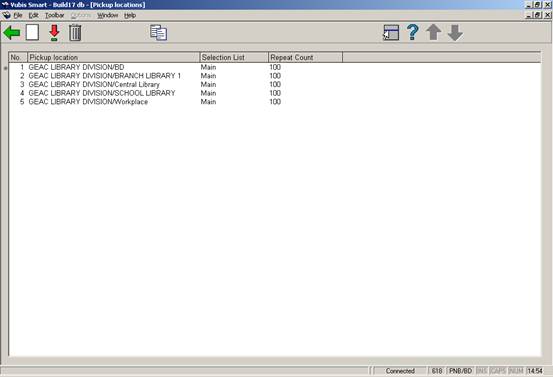
: use this option to add a new pickup location. See section 618.3.3.1 for details.
: select a line and then this option to view or modify the information. See section 618.3.3.1 for details.
: select a line and then this option to delete the pickup location. The system will prompt for confirmation.
: select a line and then this option to create a pickup location based on information in the selected record.
After choosing the or option you will be presented with an input form:
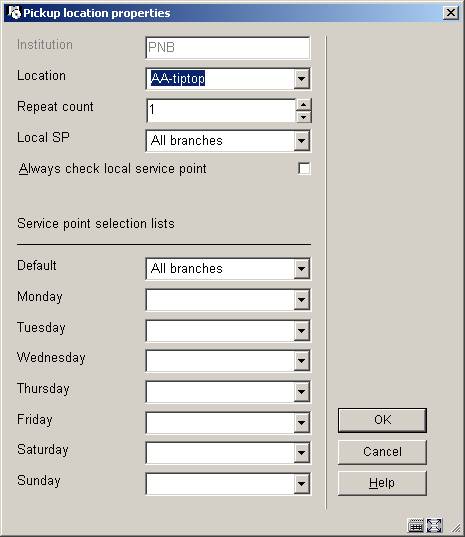
Institution: protected field; contains the code of the institution where you are currently logged in.
Location: choose the right location manager (as defined in AFO 461) from the dropdown list.
Repeat count: lets you tell the system how many times to cycle round the service points on the list to find a copy. It is possible to try several times to find a copy – even if one or more service points on the list have chosen to ignore the “message”.
Local SP and Always check local service point: are used, optionally, to tell the system which service point corresponds to the locations which are local to the service point (e.g. typically, a service point will represent branch libraries – which branch library corresponds to the pickup location ?).
This has two points of significance:
· You may wish to set up a single service point selection list for a group of libraries (for example, the “central Bristol branches”. This list can then be shared by all such branches; however we would almost invariably want to preferentially select an available item from the local service point (i.e. if there is an item available at the pickup point, then we would pick that first!). Setting the local service point entry effectively assigns THIS service point as having the utmost top priority, regardless of the setting on the (shared) service point list.
· Always check local service point – by setting this, you tell the system to keep on trying the local service point for an available copy, even though a previous request for a copy has been ignored. (Thus for example, by setting this you might end up with the following cycle – try “Local branch”, try “branch P” – try “Local branch” again – try “branch Q”- try “Local” once more… and so on.
Service point selection lists: First of all, you should note that you can use different service point lists according to the day of the week. This allows for some quite subtle fine tuning of the messaging subsystem; in particular, you might like to configure the selection lists to match your van delivery/collection periods, tailoring these to each day of the week, corresponding to the days for the van routing.
You should also remember that you do not need to set up different lists to allow for branches (service points) being closed – this is handled by defining an appropriate calendar for the service point.
This option allows you to start up the messaging processing job. This processes the reservations, searching through the defined lists for each pickup location, moving reservations through the lists as necessary. After choosing this option an input form will be displayed:

You should enter a time at which the processing should end e.g. “22:00”. In addition, enter a value in minutes for the successive passes (to how often the job should run to check through the reservations).
Note
The processing is quite intensive so, for performance reasons, you should run this as infrequently as possible but commensurate with the sorts of timeout periods you have chosen for your service points.
For example, if you typically allow each service point 3 days in which to respond to a “message”, then it is probably inappropriate to run the background process every 5 minutes!.
After clicking , you are then offered the standard screen for submitting a “process”. Normally you would schedule this in memory. However, you CAN run the process online or in batch. In this case, the processing will run ONCE only, rather than looping indefinitely; and this option would normally be used for testing.
It is possible to assign specific actions to “messages” appearing in the “route exhausted” display (AFO 418). This allows you to define specific actions or statuses to be assigned to messages appearing in the list.
After choosing this option an overview screen will be displayed:

: Select this option to create a new code. See section 618.3.5.1.
: Select a code and then this option to delete it. The system wil prompt for confirmation.
: Select a code and then this option to modify it.
: Select this option to create a new code. An input form will be displayed:

Action code: code to be assigned to this action.
Description: A description of the code.
Display icon: An icon which will appear against the messages in the route exhausted display, when this action is set against the message. This is a drop-down field – the system offers you a choice of about 16 different icons.
Hide message: This tells the system to remove the message from the display when this action is set. For example, when applying a status of “completed”, you might decide to remove this message from the display completely. You should note that the message itself is not deleted from the system – only hidden; by reversing the “hide message” setting, such messages will be made visible again.
· Document control - Change History
|
Version |
Date |
Change description |
Author |
|
1.0 |
November 2006 |
creation (delivered as part of build 17 updates) |
|
|
2.0 |
April 2006 |
new option: action codes |
Tineke vanBuul |